Grüner Samt vereint alle anmutigen Eigenschaften des Waldes in einem Stück Stoff: Er ist weich, fließend und hat eine changierende, tiefe Farbe, die gleichzeitig an reißende Flüsse und sanfte Blätterdächer denken lässt.
Perfekt also für diesen langen, grazilen Mantel, der sowohl in der Natur über einem silbernen Kleid, als auch in der Großstadt mit Shorts eine gute Figur macht und selbst Arwen vor Neid erblassen lassen würde.
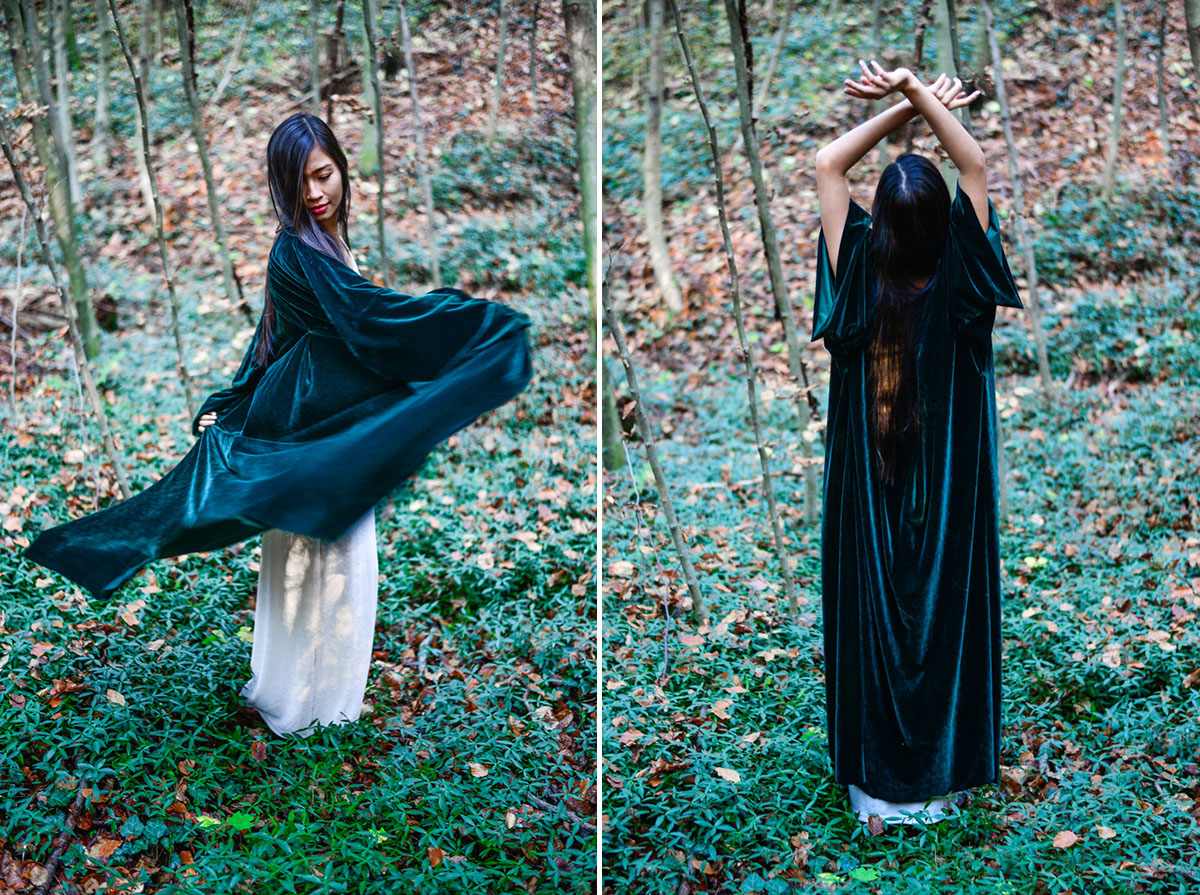
Green velvet is one of the best fabrics ever: It's soft, flowing and has a deep, dark colour which reminds us of torrential rivers and beautiful leaves.
Perfect for a long, gracile coat which looks great in nature over a silver dress but in the city over cool shorts, too.
Perfekt also für diesen langen, grazilen Mantel, der sowohl in der Natur über einem silbernen Kleid, als auch in der Großstadt mit Shorts eine gute Figur macht und selbst Arwen vor Neid erblassen lassen würde.
Green velvet is one of the best fabrics ever: It's soft, flowing and has a deep, dark colour which reminds us of torrential rivers and beautiful leaves.
Perfect for a long, gracile coat which looks great in nature over a silver dress but in the city over cool shorts, too.

Das brauchst du:
* Samtstoff, etwa 2 Meter
* Nähmaschine
* Stecknadeln, Schere, Schneiderkreide
* Nähmaschine
* Stecknadeln, Schere, Schneiderkreide
* Velvet fabric, ca. 2 metres
* Sewing machine
* Pins, scissors, chalk
So gelingt es bestimmt:
1. Schneide ein Rechteck aus dem Stoff, das deine Schulterbreite plus 30 cm breit ist, und so lange, wie der Mantel lang sein sollte – das ist der Rückenteil. Schneide dort ein 10 cm breites, rundes Teil genau in der Mitte der Schulterseite aus; hier wird dein Hals Platz haben. (Hier kannst du dir ein Bild dazu ansehen.)
2. Jetzt brauchst du noch die beiden vorderen Teile. Diese bestehen aus zwei weiteren Rechtecken, die gleich lang sind wie das erste, aber nur so breit, wie eine Schulter plus 10 cm. (Also wie eine Seite des Rückenteils, nur ohne Halsausschnitt – auch dazu gibt es ein Bild.)
3. Die beiden kleineren Vierecke nähst du oben, sowie links und rechts an das große, wobei du seitlich etwas Platz für die Ärmel lässt.
4. Den Umfang dieser Armlöcher misst du und schneidest noch zwei Recktecke aus dem Stoff aus: So breit wie der Armlochumfang und so lange, wie du sie gerne hättest. Dies sind dann die Ärmel, die du in die Armlöcher nähst (Bild).
5. Wenn du willst, kannst du jetzt noch die Kanten versäubern – bei Samt ist das aber meistens gar nicht notwenidig. Fertig ist der Waldelbenmantel!
1. Cut a rectangle out of your fabric, your shoulder length plus 30 cm wide and as long, as you want the kimono to be long. This is the back part. Leave a neckline (see a picture of it here).
2. Cut out two more rectangles, as long as the first, but only as wide as one shoulder plus 15 cm. (So as wide as one side of your first rectangle width without neckline – here you can find a picture.)
3. Sew the two smaller rectangles left and right on your bigger rectangle. Leave a hole for the sleeves.
4. Measure the scale of the holes for the sleeves and cut two other rectangles out of the fabric. They should be as wide as the scale of the holes. These are your sleeves.
5. Sew them on your kimono – it should look similar to this picture.
6. Finished! Your kimono is ready to see the city!


Credits:
Idea, Words: Diana Ranegger | Photographs: Diana Ranegger and Clarissa Kober
0 comments:
Post a Comment