Saturday, 20 December 2014

Places to be: Feschmarkt

Dies ist der Beginn einer Postreihe, in der es um Orte geht, die man in Graz unbedingt mal gesehen haben muss. Manche würden zwar sagen, dass Graz nicht einmal eine wirkliche Stadt ist, aber wir lieben diesen Ort, denn es gibt immer wieder Neues zu entdecken! In dieser Serie werden wir euch viele unserer Lieblingsplätze zeigen und euch sagen, warum wir sie so gerne haben.
Beginnen werden wir heute eher mit einem Event als einem Ort: Nämlich dem Feschmarkt. 

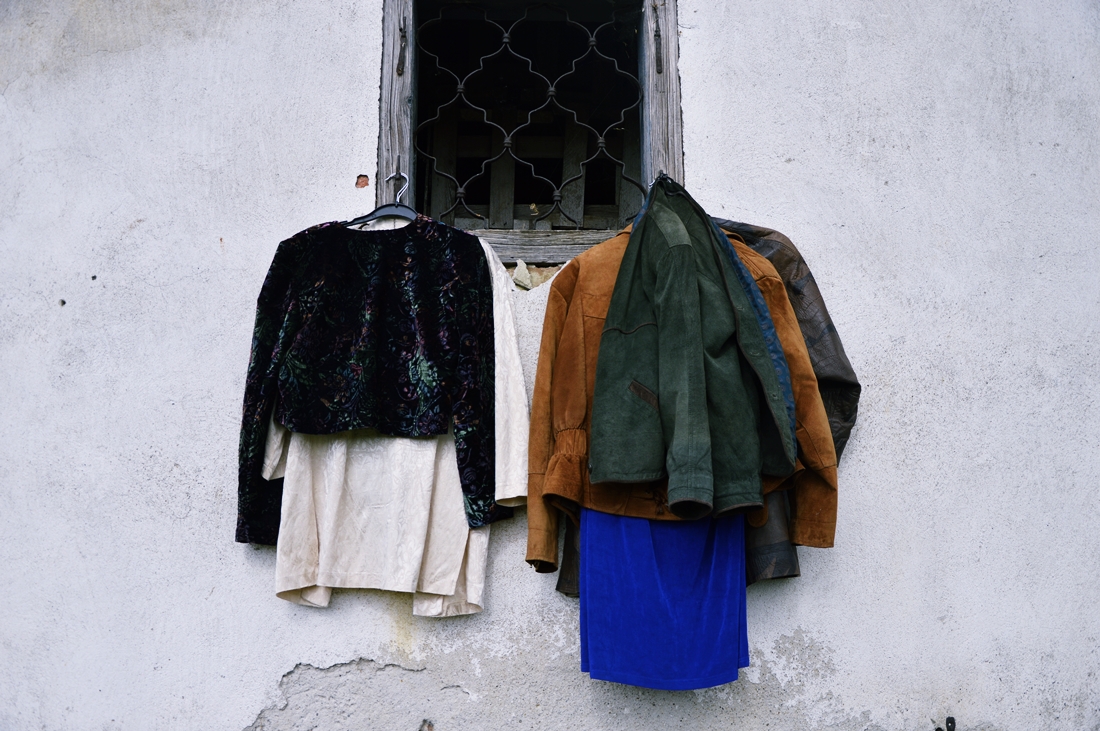
Da wir nicht nur Vintage lieben, sondern auch begeisterte "Doityourselflerinnen" sind, ist dieser Markt genau das Richtige für uns. Er bietet einfach alles, was das Designerherz begehrt: Von Interior über leckeres Essen, bis hin zu Kleidung und Accessoires. Und besonders jetzt, kurz vor Weihnachten perfekt, um den Liebsten noch etwas Schönes (noch dazu handgemacht und fair-trade!) zu besorgen. 

Auch wenn die Papierfabrik ein recht kleiner Ort für so eine große Veranstaltung ist und dadurch Menschen quasi nur auf den Füßen anderer Menschen stehen; wir sind begeistert und legen euch den Feschmarkt wirklich sehr nahe, die drei Euro Eintritt sind es wert! :)

Ganz besonders begeistert haben uns die handgemachten BHs (weil man nach schöner fair-trade Unterwäsche wirklich ewig suchen muss!), die coolen Betonblumentöpfe (davon bräuchten wir tausende!) und (natürlich!) die feschen Wundertüten, die man für 15 Euro erwerben kann (zugegeben, wir lieben Überraschungen). Außerdem ist das ganze Ambiente dort einfach 1A!

Wo? 
Papierfabrik, Ungergassse 24a

Wann? 
Noch heute und morgen – aber er kommt bestimmt wieder!

This will be a series of posts about our hometown Graz. Graz is the second-biggest city in Austria and nevertheless a very small town. You could find wonderful places there though. 
In this post series I want to show you all our favourite spots and tell you what we love about them. Some will be more hidden than others but all are something special and worth a visit. This first post is not really about a place, but about an event: The Feschmarkt.

That we love vintage is no secret, that we are into DIY is hopefully also clear. So this market was perfect for us! You can find really everything here, what the heart of a designer wants or needs: From interior to delicious food; but also fashion and accessories. And now, when it's the time before Christmas you could get a great handmade and fair-trade present as well!

Even if the Papierfabrik is a really small place and you stand more often on feet than on the ground; we are amazed and really want you to go there, too! The three Euros are worth it for sure!

What we loved most were the handmade bras (it's so difficult to find beautiful fair-trade underwear), the cool flower pots (we'd need hundreds!) and (of course!) the grab bags that cost 15 euros (yes, we are into surprises). Besides, the ambience is top!

Where?
Papierfabrik, Ungergasse 24a

When?
Today and tomorrow – but it's coming again for sure!
Credits: 
Idea: Clarissa Kober and Diana Ranegger || Photos: Clarissa Kober || Text: Diana Ranegger
Read More

Thursday, 18 December 2014

Fabric Care: Alpaca Wool

Aufgrund des heutigen Adventkalendertürchens gibt es hier einen besonderen Post: Es geht um Alpakawolle, ihre Herkunft und die Pflege.

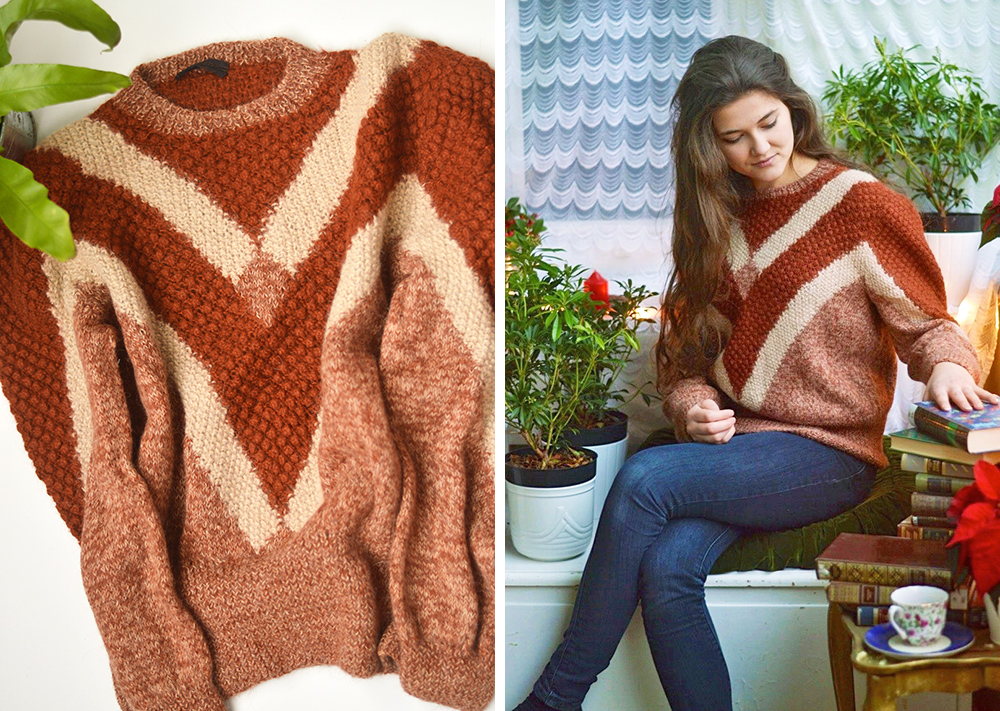
Unter dem Material Alpaka versteht man die Wolle des Alpakas, einer Kamelform. Sie ist besonders weich und warm, da hierfür die feine Unterwolle verwendet wird – perfekt also für warme Winterpullover!
Die Faser wird in Europa noch eher selten verwendet, da die Tiere hauptsächlich in den Anden (vor allem in Peru) beheimatet sind. Darum ist es besonders wichtig, hier nachhaltig zu kaufen; also etweder biologisch und fair oder eben vintage.

Egal wofür ihr euch entscheidet, es ist immer die richtige Wahl. Denn Alpaka, wie alle Wollsorten, ist sehr pflegeleicht und muss nur sehr selten gewaschen werden. Meist reicht es, die Teile an die Frische Luft zu hängen und schon verlieren sie üble Gerüche. Bei stärkeren Verschmutzungen, wenn Wasser unvermeidbar ist, nur mit Handwäsche oder im Wollwaschgang waschen, am besten auf die linke Seite gedreht, damit die "schöne" Seite nicht so stark beansprucht wird. Und zum Schluss, das richtige Waschmittel nicht vergessen, auf Weichspüler ganz verzichten.

Wer jetzt Lust auf Alpakapullover bekommen: Hier findet ihr DEN perfekten Pulli, der noch dazu an einen flauschigen Fuchs erinnert! :))
Wem dieser nicht gefällt, auch hessnatur hat nachhaltig und fair produzierte Kleidungsstücke aus Alpaka, die bestimmt genauso warm halten wie unserer.
Credits: 
Idea, Photos and Text: Diana Ranegger
Read More

Wednesday, 17 December 2014

DIY: How to bring Christmas in your Home

Ich würde Glas Plastik oder Aluminium immer vorziehen. Aus Glas schmeckt alles einfach besser, es ist gesünder und nachhaltiger. Obwohl Glas nach dem Wegwerfen recyclet wird, finde ich es trotzdem noch besser, es selbst nocheinmal wiederzuverwerten. Darum hier ein kleines Weihnahtsduft-DIY.

I'd always prefer glass to plastic bottles or cans. Out of glass everything tastes better, is healthier and more sustainable. Although the glass gets recycled afterwards I thought it would be even better to reuse by myself. Here a little Christmas-scent-DIY.
Das wird gebraucht:

* Alte Gläser 
* Kräuter, Blüten, Gewürze oder Früchte

* Jars
* Herbs, Petals, Spices or Fruits

So wird's gemacht: 

1. Dieses Projekt ist wirklich sehr einfach und perfekt, um noch ein wenig weihnachtlichen Flair ins Haus zu bringen, ohne chemische Gerüche zu versprühen. Ich habe alte Apfelmus- und Tomatensaucengläser genommen und sie in warmes Wasser eingelegt, um das Papier darauf zu entfernen.

2. Danach habe ich die duftenden Zutaten auf die Gläser verteilt: In das erste kam frischer Rosmarin von meinem Balkon, in das zweite Apfelscheiben und in das dritte eine Mischung aus getrockneten Rosenblüten, Hibiskus und Zimt (die ersten zwei hab ich vom Naschmarkt in Wien).

3. Zum Schluss das Ganze einfach mit kochendem Wasser aufgießen. Um ehrlich zu sein, riechen die Apfelscheiben nicht wirklich nach viel, darum hab ich sie gleich einmal aufgegessen. Aber die anderen beiden Gläser verströmten einen wunderbaren Duft und vor allem das Rosen-Hibiskus-Zimt-Wasser hat später auch als Tee wunderbar geschmeckt! :)

1. This is a very easy way to bring Christmas in your home without any chemical scents. I used old apple- and tomato sauce jars and put them into warm water for a few minutes, so I could remove the paper that stuck on them.

2. Afterwards I prepared the jars: In the first one I put a fresh rosemary branch (from my balcony rosemary), in the second one just apple slices and in the last one dried roses, hibiscus and cinnamon.

3. In the end I covered them with boiling water. To be honest, the apple slices didn't smell that much, so I just ate them when the water has cooled down. But the others were wonderful fragrant and especially the rose-hibiscus-cinnamon-water was great to drink as a tea afterwards! :)
Credits: 
Idea, Photos and Text: Diana Ranegger

Read More

Monday, 15 December 2014

DIY Canvas Tote Bag

Jetzt heißt es ran an die Nähmaschine! Denn mit diesem DIY werden wir keine Plastiksackerl mehr brauchen. Es geht ganz einafch und schnell und ist noch dazu extrem umweltfreundlich, wiederverwertbar und frei von synthetischen Materialien. Also, los geht's!
PS: Wer doch nicht selber nähen kann oder will, sollte vielleicht eine Dogdays of Summer Stofftasche in Erwägung ziehen ;)

Now we start sewing! Because this DIY is amazingly simple and with it we won't need any plastic bags anymore. It's done very fast and the finished product is eco-friendly, reusable and free of synthetic materials. So, let's get started!
PS: Who doesn't want to sew could still get a Dogdays of Summer canvas tote bag ;)
Das wird gebraucht: 

* 2 Stoffstücke (38x33cm) – eine Naturfaser natürlich  
* 2 Stoffstücke (62x5cm) – auch hier Naturfaser  
* Schere, Nähmaschine

* 2 Pieces of Fabric (38x33cm) – a natural fabric of course
* 2 Pieces of Fabric (62x5cm) – also here natural fabric
* Scissors, Sewing Machine

So wird's gemacht: 
1. Die langen Stoffstücke jeweils in der Mitte falten und längsseitig – rechts auf rechts – zusammennähen. 
Die beiden größeren Stücke übereinanderlegen und ebenfalls rechts auf rechts zusammennähen. Dabei sichergehen, dass oben eine Öffnung bleibt (man will ja später etwas in die Tasche geben können). Jetzt hast du zwei lange, dünne Streifen und ein großes Rechteck.

1. Fold each of the long pieces in the middle and sew them – right side on right side – together. 
Now take the big fabric pieces and lay them on each other – also right side on right side. Sew them together on three sides. Remember to leave the top out (I'm sure you want to put something inside once). Now you have two long, thin stripes and one big rectangle.
2.  Drehe nun alle Teile um, sodass die "schöne" Seite außen ist. Jetzt musst du nur noch die Henkel der Tasche annähen. Sehr schön wäre es außerdem noch, wenn du die Schnittkanten versäuberst. Und schon bist du fertig und brauchst nie mehr blöde Plastiksackerl zum Einkaufen :)

2. Now turn all pieces over. The "beautiful" side is visable now and you just have to sew the straps on the bag. It would also be great if you trim the edges. Now you have finished. You won't need any plastic bags anymore for shopping! :)
Credits: 
Idea, Photos and Text: Diana Ranegger
Read More

Bring me Ice Age

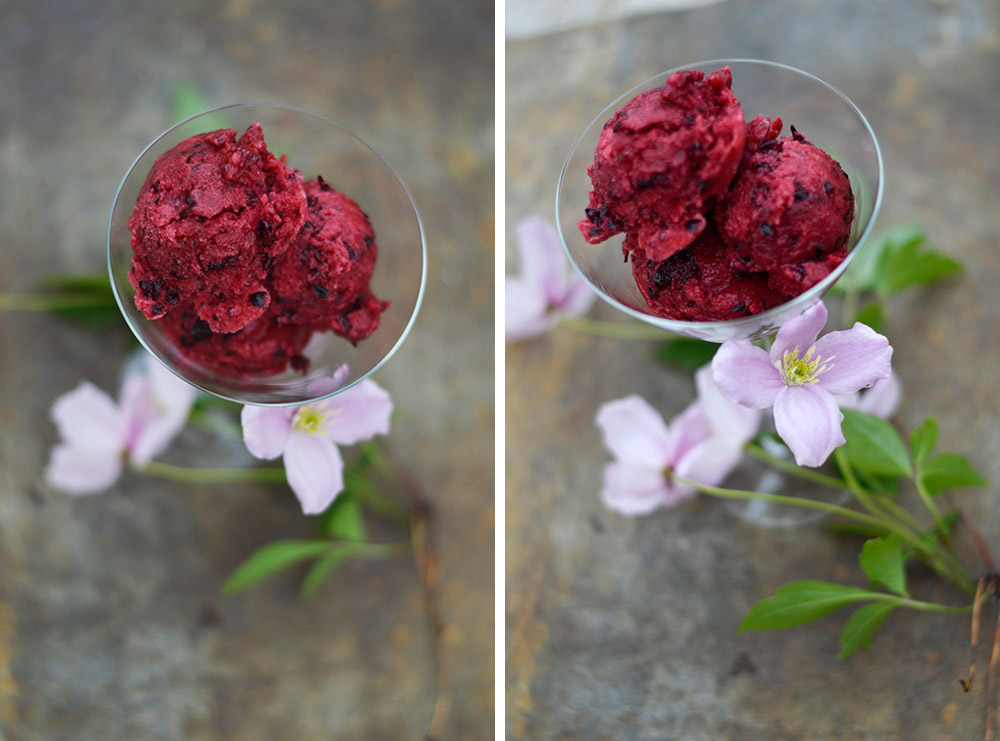
Auch wenn im Winter typischerweise nur draußen Eiszeit herrscht, bei uns ist es heuer so warm, dass wir sie uns ins Haus holen müssen. Meine kleine Schwester hat mir einmal ihr eigenes Eis serviert – und ich muss zugeben, es war wundervoll! Der größte Vorteil: Man braucht nicht mal eine Eismaschine dafür. 

Even if your normally don't eat ice cream in winter, it's so warm here that I make an exception. My little sister served me her own created ice cream once – and I have to say, that it tasted amazing! The greatest benefit: You don't need an ice machine for it.
Das wird gebraucht:

* Eine Hand voll gefrorener Beeren (am besten aus dem eigenen Garten – sie hat Jostabeeren genommen)
* 1 Banane, am besten auch gefroren
* 100 ml Orangensaft

* A hand full berries (preferred from your own garden – she took Jostaberries), frozen
* 1 Banana, best also frozen
* 100 ml Orange Juice

So wird's gemacht:

1. Alles so lange mixen, bis eine homogene Creme entsteht. Sofort servieren.

1. Blend everything till soft and smooth and serve immediately.
Credits: 
Idea, Photos and Text: Diana Ranegger


Read More

Saturday, 13 December 2014

Healthy vegan chocolate cream

Schokolade muss ja nicht zwangsläufig ungesund sein. Diese Creme zum Beispiel, besteht nur aus Kakao, Tofu, Kokosnuss und Agavendicksaft; ist also ohne Zucker und sogar vegan. Sie ist einen Versuch wert!

Acutally, chocolate doesn't have to be unhealthy. This cream is just out of cocoa, tofu, coconut and agave nectar; so without sugar and even vegan. It's definitely worth a try!
Das wird gebraucht: 

* 1 Packung Seidentofu (sollte aus Österreich sein!)
* 2 EL Agavendicksaft
* 1 EL Kakao (oder mehr, wenn du es schokoladiger magst)
* 1 EL Kokosflocken
* Ein paar vegane Schokostückchen zum Dekorieren

* 1 pack Silk Tofu (should be out of your country!)
* 2 tbsp Agave Nectar
* 1 tbsp cocoa (or more, if you want)
* 1 tbsp Coconut Flakes
* A few vegan chocolate pieces for decoration

So wird's gemacht: 

1. Mixe alle Zutaten bis auf die Schokostückchen zusammen und dekoriere die Creme danach hübsch :)

1. Mix all ingredients together and decorate the cream afterwards :)
Read More

Friday, 12 December 2014

Fighting against Prodigality

Viele von euch werden diesen Post schon kennen, mir ist es aber sehr wichtig, dass ihn jeder lesen kann. Darum poste ich ihn hier noch einmal und hoffe, dass ihr alle Englisch könnt ;)
Today I want to talk about prodigality.
About one year ago I read this blogpost from DARIADARIA. It's about our clothes getting produced in Asia where the workers don't get paid enough (not only "not enough" but much tooooo less!) just because we want to buy cheap clothes. 
It was thought-provoking and I had bad conscience. But I didn't know what to do instead; I am a student, don't have a job (well, okay, no real "money-job") and can't afford fair-trade-garments from the EZA-stores.
So I continued buying stuff at common shops just because I didn't know what to do instead.
Then, in February, I went to Berlin where the only things I bought were stuff in Vintage shops. They were really expensive, but I loved these unique pieces and thought that it was better because they didn't get produced for me, but for someone else before. I just kind of saved them from the rubbish bin.

After the days in Berlin Clarissa and I started thinking more and more about an own vintage shop. At the beginning just a big dream, it got more and more a real project - especially when I started coding an online shop for university.
At first we just searched for beautiful second hand things but soon we tried to find pieces which got produced in Europe (especially Italy, Austria and France; but some are also from Denmark, Germany and Greece) and to keep an eye on natural materials (such as wool, cotton and leather). That's not always possible but second-hand-Polyester is still better than new and "fresh" synthetic materials.

I love the work I'm doing for the shop now. I love it, because I love all the clothes and it feels better than saying people that they should buy this pullover which got produced in China and is old-fashioned in two months. 
I have to admit that I still buy a few things at "normal" "local" stores (such as underwear), but I reduced my buying habits and started to think a lot about the clothes I'm wearing. If not vintage or at least second hand than preferred DIY. Even if it is often more expensive than buying a finished product.

So, to come back to the beginning and the fate of being a student without lots of money. Besides all the reasons I've already mentioned there was another point I tried to reach with my own online shop: Fair clothes for people without much money. There are many vintage online shops but they have breathtaking prices - in the negative way. If a shirt costs 70 dollars, it can look whatever it wants to look like - I wouldn't buy it. But for "normal H&M"-prices I would prefer buying more unique and fairer stuff.
Well, this is the end of my little Think-First-Column. I'd love to hear your thoughts about the topic and look forward to hearing from you ;)

Credits: 
Idea, Photos and Text: Diana Ranegger
Read More

Tuesday, 9 December 2014

DIY: Dogdays of Summer Piñata

Silvester steht vor der Türe? Es gibt etwas zu feiern? Großartig! Aber keine Party ohne einer richtigen Piñata. Und mit diesem DIY wird deine eigene, selbstgemachte DER große Hit. Einfach den Schritten unten folgen und du hast den größten Partyknüller der Welt!

New Year's Eve is comming? There is something to celebrate? Great! But no party without a genuine piñata. And with this DIY your own hand-made one will get THE big hit. Just follow the steps below and soon you are going to have the greatest biggie in the world!
Das wird gebraucht:

* Karton (viel davon!)
* Krepppapier
* Klebeband
* Kleber
* Stift
* Vieeeeeele Süßigkeiten
* Meeeeeeehr Konfetti

* Cardboard

* Crepe Paper
* Adhesive Tape
* Glue
* Pen
* Loads of Sweets
* Loads of Confetti

So wird's gemacht:   


1. Als erstes musst du dir überlegen, welche Form deine Piñata haben soll. Wenn du das entschieden hast, kann es los gehen! Zeichne den Umriss auf den Karton - zweimal, damit du ein Vorder- und ein Rückteil hast. 

1. At the beginning you have to make up your mind: Which shape should your piñata have? When decided draw it on the cardboard. Remember to do this twice - you'll need a front and a back part. 

2. Schneide die beiden Teile aus. Nimm den restlichen Karton und schneide ihn in Streifen. Sie sollten so breit sein, wie dann auch deine Piñata breit sein soll (unsere war ca. 15 cm).

2. Cut out the two parts. Take the rest of your cardboard and cut it into some straps. They should be as wide as you want your piñata to be thick (ours was about 15 cm). 
3. Mit den Kartonstreifen und dem Klebeband beginne jetzt, die Vorder- und die Rückseite miteinander zu verbinden. Lass oben ein Loch.

3. With the cardboard straps and the adhesive tape start to connect the front and the back part. Leave a hole at the top.
4. In das Loch, fülle jetzt Konfetti und Süßigkeiten. Am besten eignen sich Zuckerl, aber auch Schokoladenriegel oder kleinere Täfelchen sind eine gute Alternative. Aber Achtung: Die Dinger sollten nicht zu schwer sein, sonst verletzt sich am Ende noch jemand ;) 
Jetzt schließe das Loch mit Klebeband. Am besten gibst du irgendetwas darunter (z.B. Krepppapier), damit die Konfetti nicht daran kleben bleiben.

4. Into the hole, fill in confetti and sweets. Loads of confetti and sweets! Now close the hole with adhesive tape. Remember to put something under the tape (like some crepe paper) to make sure that nothing sticks to it afterwards. 

5. Nimm nun das Krepppapier und schneide es in 6 cm lange Rollen. Schneide diese jeweils ca. 75% ein (ganz oft) und rolle sie aus. 

5. Take the crepe paper and cut it into about 6 cm long reels. Cut these reels up to 75% and unroll them.
5. Klebe nun das fransige Krepppapier auf die Piñata, hänge sie auf und fertig ist der Spaß! Die Party kann kommen - aber bitte den Baseballschläger nicht zu Hause vergessen! ;)

5. Glue the fringed crepe paper on your piñata, hang it up - finished! Let the party come and don't forget the baseball bat at home! ;)

Read More

Monday, 8 December 2014

Stay Gold

STAY GOLD (acoustic version) - First Aid Kit

Hey und Willkommen auf dem offiziellen Dogdays of Summer Blog! Wir freuen uns wirklich, dich zu sehen, es wird bestimmt sehr lustig - versprochen! 
Was euch auf diesem Blog erwartet, sind schöne DIYs, Rezepte und jede Menge Einblicke hinter die Kulissen unseres Businesses.
Ihr werdet die Leute hinter dem Shop kennenlernen, aber auch die Möglichkeit bekommen, Fragen zu stellen und Neues über unsere Ideen und ethische Einstellungen zu erfahren.

Die meisten Posts werden von mir - Diana - geschrieben, aber es gibt sicher auch mal Gastposts, damit ihr mal andere Blickwinkel und Ansichten zu sehen bekommt. Da es für mich immer wieder traurig ist, wenn ich Blogs finde, die ich aufgrund der Sprache nicht lesen kann, habe ich beschlossen, diesen Blog meist zweisprachig zu führen. Manchmal kann es aber auch vorkommen, dass Posts nur in Englisch oder nur in Deutsch vorhanden sind.

Wenn ihr Wünsche zum Inhalt habt, Fragen oder was auch immer - bitte habt keine Scheu und schreibt uns! Die E-Mail-Adresse ist blog@dogdaysofsummer.at und wir freuen uns wirklich über jedes Nicht-Spam-Mail ;)

Also lehnt euch zurück, genießt die Dogdays of Summer - auch wenn sie nur mehr in unseren Köpfen existieren.
Stay gold.

-Cheers


Hey out there and welcome to the official Dogdays of Summer blog! We are very happy to see you and this is gonna be so much fun - promise!
What we gonna do on this blog is to show you beautiful DIYs, recipes and a lot of sneak peeks behind the scenes of our business.
You will be able to get to know the people around the shop, as well as ask questions and get some information about our ideas and ethics. 

Most of the posts will be written by me - Diana - but there will probably be some guest bloggers that show you different views on some things. Because of all international readers we decided to write most of this blog not only in German, but also in English. That's good practice for both of us, right? ;)

If you have special wishes about the content, questions or whatever - please feel free to write us an E-Mail to blog@dogdaysofsummer.at. 

Lean back, have fun and enjoy the Dogdays of Summer - even if they only exist in our minds at the moment.
So stay gold.

-Cheers.
Read More